Repair broken equipment with precision. Stop searching for obsolete components. Use 3D printing to create custom replacement parts for your tools, appliances, and vintage machines. This guide provides the exact steps to go from a broken part to a functional repair.
Identify the Problem
Start by examining the broken component. Determine why it failed. Look for cracks, wear patterns, or missing pieces. Understand the forces acting on the part during normal operation.
Ask these questions before you begin the design process. Does the part rotate. Does it hold weight. Does it encounter high temperatures. Is it exposed to chemicals or sunlight. The answers dictate your material choices and design requirements.
Gather Accurate Measurements
Precision is the most important factor in a successful repair. Use digital calipers for all measurements. Avoid tape measures for small components. Tape measures lack the necessary accuracy for tight tolerances.
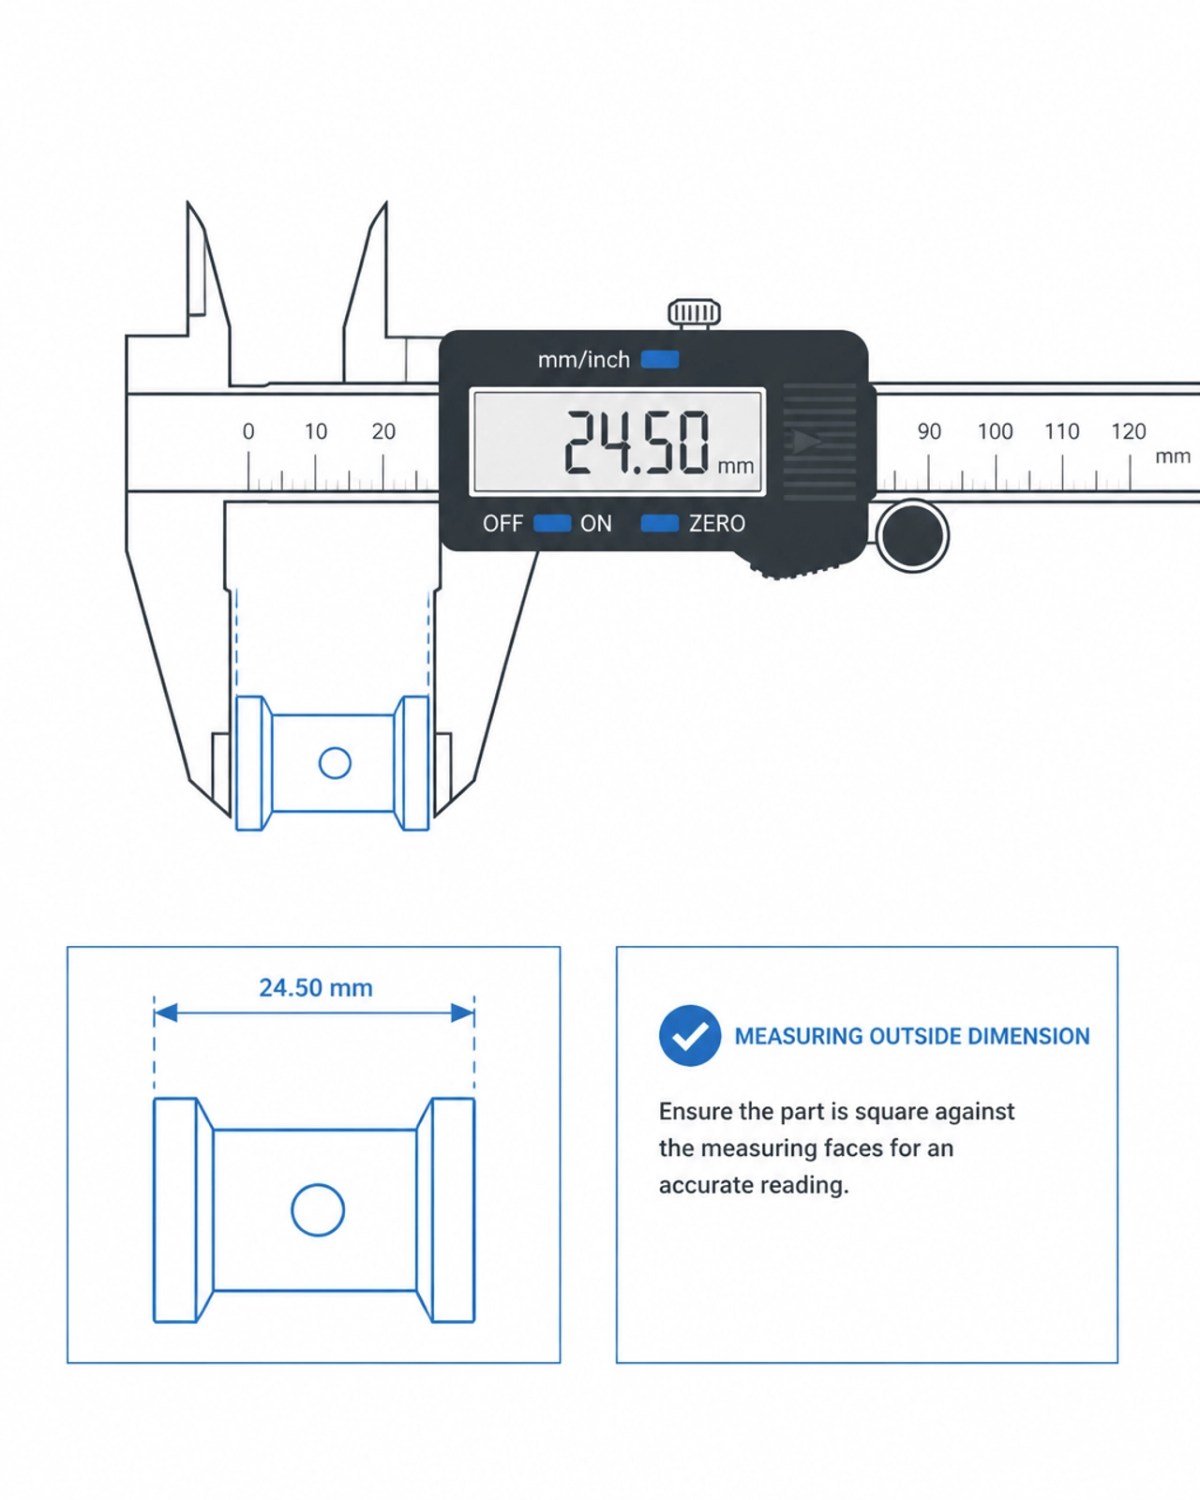
Follow these steps for accurate data collection.
- Clean the original part. Remove grease, dirt, or debris that might interfere with measurements.
- Zero your calipers. Ensure the display reads exactly 0.00 before you start.
- Measure the critical dimensions. These include hole diameters, shaft widths, and total lengths.
- Record measurements in millimeters. Most 3D design software and slicers use metric units by default.
- Use the depth gauge on your calipers for holes and recesses.
- Measure the mating part. If the original piece is missing or shattered, measure the space where it fits.
Capture the geometry of every feature. Note the spacing between holes. Measure the thickness of walls. Accurate data prevents multiple failed prints.
Choose the Right Material
Select a filament based on the environment of the part. Not all plastics handle stress or heat in the same way. Refer to this list to match your needs with the correct material.

PLA (Polylactic Acid)
Use PLA for indoor decorative items or low stress parts. It is the easiest material to print. It offers excellent dimensional accuracy. However, it becomes soft at temperatures above 50 degrees Celsius. Do not use PLA for parts inside a car or near a motor.
PETG (Polyethylene Terephthalate Glycol)
Select PETG for mechanical parts that require some flexibility. It is more durable than PLA. It resists higher temperatures and UV light. Use PETG for brackets, clips, and outdoor housings. It strikes a balance between ease of use and functional strength.
ABS or ASA
Choose ABS or ASA for high heat applications. These materials are very tough. ASA is especially good for long term outdoor exposure. Be aware that these materials require an enclosed printer to prevent warping. They also produce fumes that require ventilation.
Nylon
Use Nylon for gears, bearings, and parts that rub together. It has a low coefficient of friction. It is extremely tough and resists impact. Nylon requires a dry environment because it absorbs moisture from the air quickly.
Source the Geometry File
You need a digital file to start the printing process. You have two main options. You can find a ready made file or design one yourself.
Search for Existing Files
Check online repositories first. Websites like Thingiverse and Printables host millions of community designs. Use the manufacturer name and part number in your search.
If the part is obsolete or discontinued, visit the 2Dcnc replacement parts library. We specialize in geometry files for hard to find components. Browse our shop to see if the file already exists for your specific machine.
Design Your Own Part
Create a custom file if no existing model fits your needs. Use CAD software to build the geometry based on your measurements.

Follow these rules for mechanical design.
- Use Tinkercad for simple shapes. It is web based and very easy to learn.
- Use FreeCAD for precise mechanical engineering. It allows you to change dimensions later without rebuilding the model.
- Add reinforcements to weak points. Increase the thickness of areas that broke on the original part.
- Include tolerances. 3D printers often print parts slightly larger than the digital model. Leave a gap of 0.2 millimeters for parts that must slide together.
- Add fillets and rounds. Sharp internal corners create stress points. Curved edges make the part stronger and easier to print.
Prepare the Print File
Import your 3D model into a slicer program. The slicer converts the model into instructions for the printer.
- Orient the part for strength. 3D prints are weakest between the layers. Place the part so the layers do not pull apart under load.
- Set the infill density. Use 20 percent infill for light parts. Use 50 percent or more for functional mechanical parts.
- Select the wall count. Increase the number of walls to at least 4 or 5 for replacement parts. More walls often provide more strength than high infill.
- Add supports if your part has overhangs. The printer cannot print in thin air.
- Review the preview. Look for thin areas or gaps in the toolpath before you start the print.
Execute the Print and Test
Start the print process. Monitor the first layer to ensure it sticks to the bed properly. Most print failures happen in the first few minutes.
Once the print finishes, remove the supports carefully. Test the fit on your machine.

- Check the dimensions. Use your calipers to verify the printed part matches your design.
- Perform a test fit. Slide the part into place. Do not force it.
- Identify areas for improvement. Note if a hole is too small or a wall is too thin.
- Iterate the design. Update your CAD file and print again if the fit is not perfect.
Successful repairs often require two or three versions. Do not get discouraged by a first attempt that is slightly off. Each version brings you closer to a working machine.
Maintain Your Repaired Equipment
Inspect the 3D printed part regularly. Look for signs of fatigue or heat damage. Replacement parts serve as a bridge to keep your equipment running. They save money and prevent functional machines from ending up in a landfill.
Visit our blog for more tips on restoring vintage equipment and manufacturing custom components. We help you find the geometry you need to fix what is broken.
Save your files for future use. If the part breaks again, you can print a new one in minutes. This is the ultimate advantage of digital manufacturing.